13 Dec 2022
Jon Hardy provides a comprehensive guide to the various techniques for conducting this in small animals.
Jon Hardy
Job Title
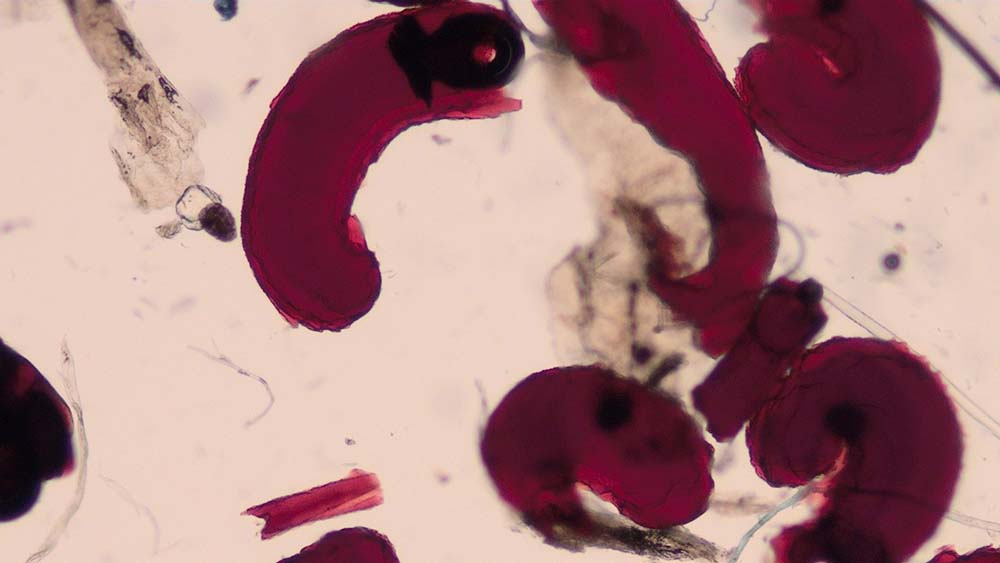
Figure 1. Flea faeces found on a coat brushing of a dog.
Dermatological disorders are very common and account for around 20% of all small animal consultations in general practice (Hill et al, 2006; O’Neill et al, 2021).
However, as the skin can only respond to pathology in a certain number of ways, it is rare to be able to make a definitive diagnosis without performing diagnostic tests. Reaching a definitive diagnosis is important, as it allows the most effective treatments to be selected and it provides the owner with a prognosis.
Most routine diagnostic tests for the skin can be performed and interpreted “in-house”.
It may not always be possible to take and interpret them within the time constraints of a consultation, but having practice support staff to assist can be extremely helpful – colleagues with enthusiasm, and the time to learn and practise – can soon become very proficient dermatology assistants.
This article aims to revise the most common in-house diagnostic tests for dermatology patients, focusing on when and how to do them, and how to examine them with a microscope.
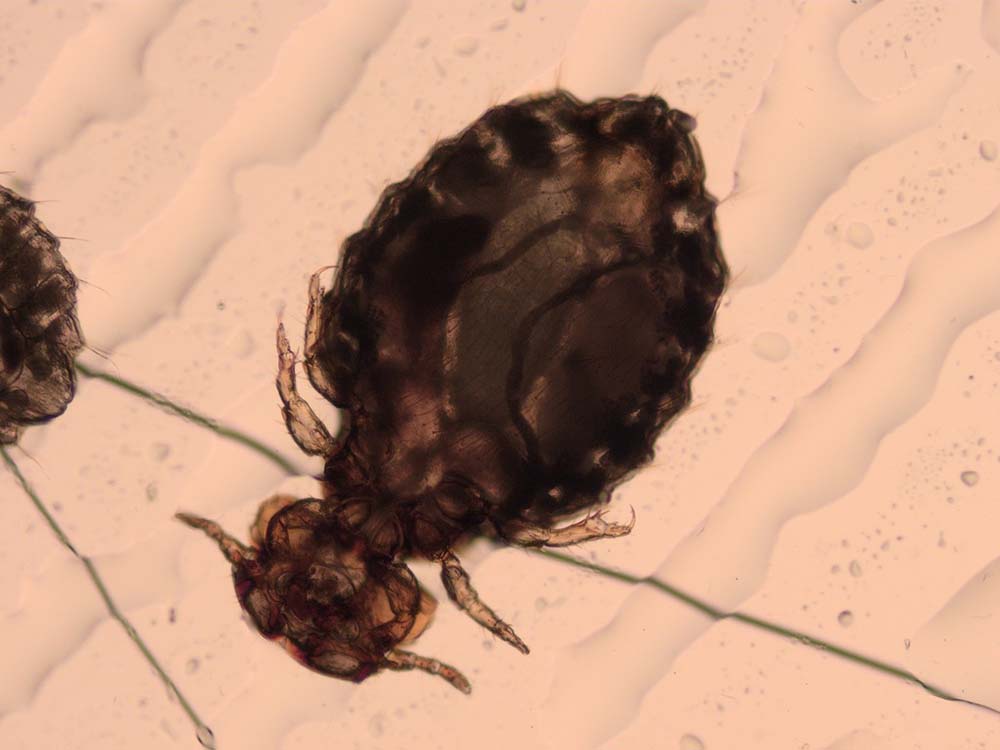
Coat brushing is performed in patients presenting with pruritus and scaling to look for evidence of superficial parasites.
These include fleas and their faeces (Figure 1), lice (Figure 2), Cheyletiella species, and Neotrombicula autumnalis (harvest mites).
The technique involves brushing the animal’s coat to collect scale/debris for microscopic examination. This can be performed with a toothbrush or comb, although the author prefers to brush the animal’s coat vigorously with a hand to displace debris.
In small animals, this can be done on to a tabletop; in larger dogs, a piece of paper or card can be placed on the floor behind the patient in a sitting position.
The displaced material is then gathered up and transferred to a few drops of paraffin oil on a microscope slide. A coverslip is then placed on top.
The whole area under the coverslip is scanned with the low-power 4× objective lens (usually labelled with a red line). A 10× objective lens (yellow line) can be used if an area of interest is found, but usually no need exists to use more powerful lenses than this.
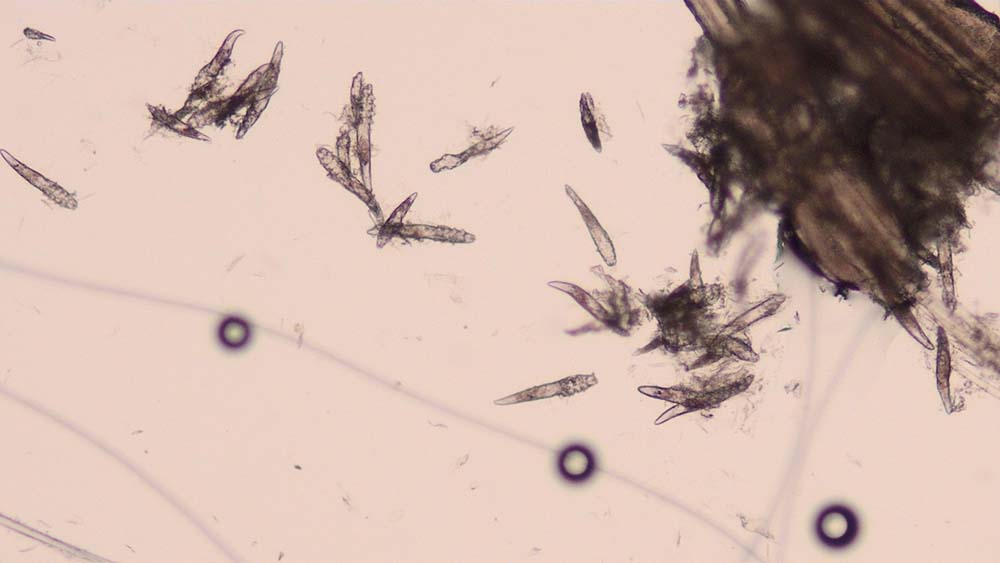
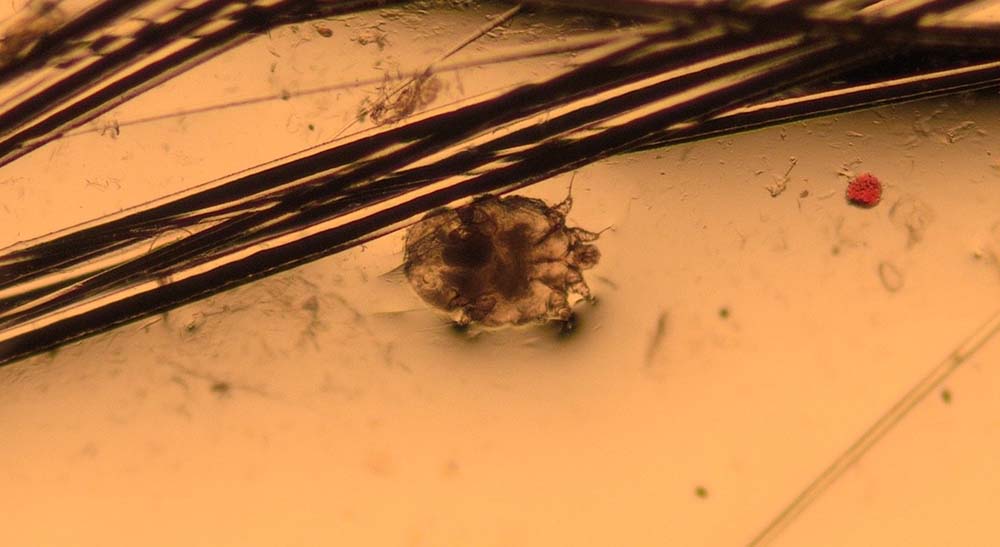
Skin scrapings are indicated in dogs and cats presenting with pruritus, scaling, alopecia, crusting and comedones.
They are taken to look for evidence of parasites such as Demodex species (Figure 3), Sarcoptes scabiei (Figure 4), Cheyletiella species, Neotrombicula autumnalis, lice and, occasionally, Otodectes cynotis.
Skin scrapes are performed using a number 10 scalpel blade held at 90° to the skin; the surface layers of the skin are then scraped to collect material for examination.
The scraped material is transferred to a few drops of paraffin oil on a microscope slide and a coverslip is applied. It can be helpful to apply a small amount of paraffin oil to the area of skin to be scraped first to help material stick to the scalpel blade. Clipping of the hair at the site may also be needed if this prevents access to the skin.
Whether skin scrapings need to be deep or superficial depends on the differential diagnoses for the case. If demodicosis is suspected, deep skin scrapes are needed, owing to the mites’ follicular location. Superficial skin scrapings are sufficient to find surface-dwelling parasites such as lice and Cheyletiella species.
The whole area under the coverslip is scanned with a low-power 4× objective lens; a 10× objective lens can be used to focus on an area of interest.
Trichography is the microscopic examination of plucked hairs, and it can provide a lot of useful information.
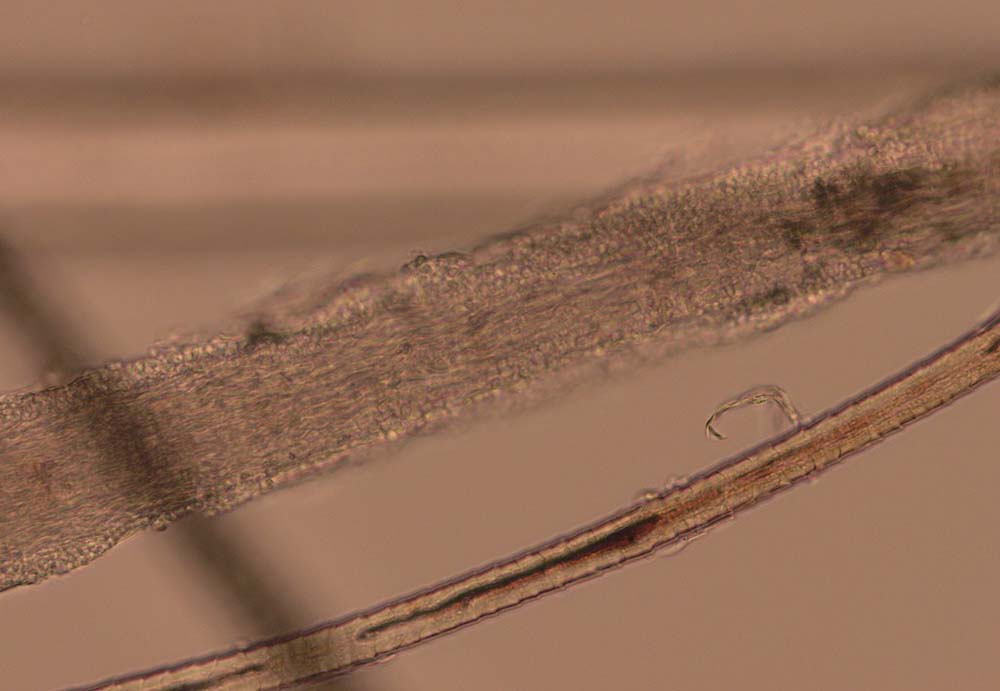
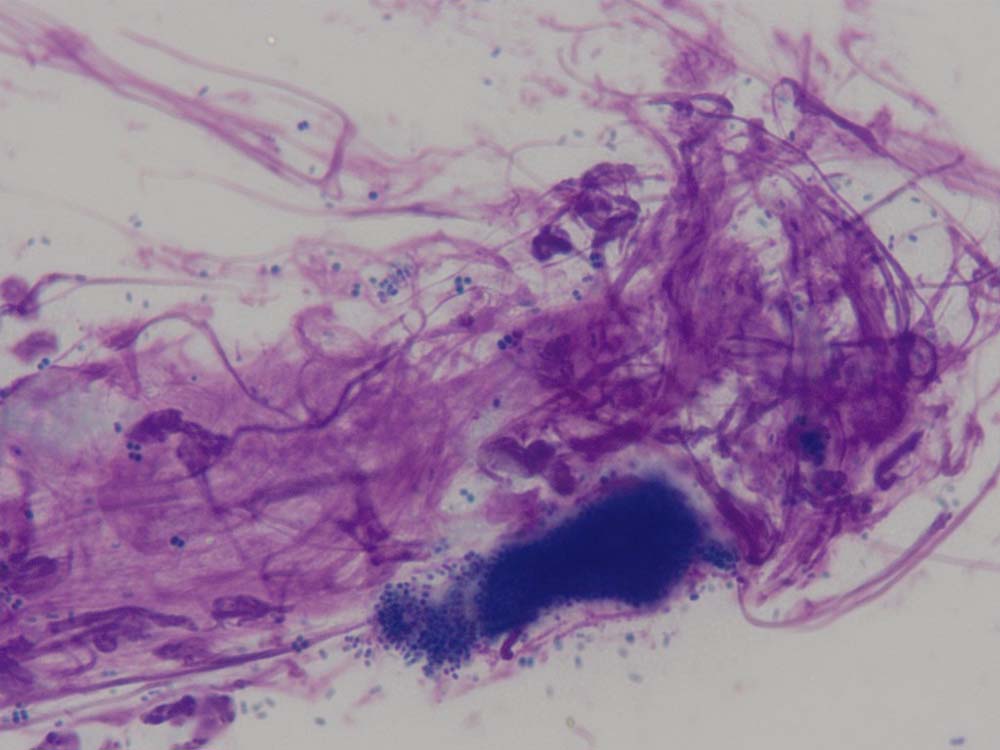
Hair plucks can be used to look for evidence of parasites such as Demodex species (Figure 5), lice (eggs) and Cheyletiella species (eggs). The structure of the hair becomes disrupted in dermatophytosis (Figure 6) and some types of follicular dysplasia.
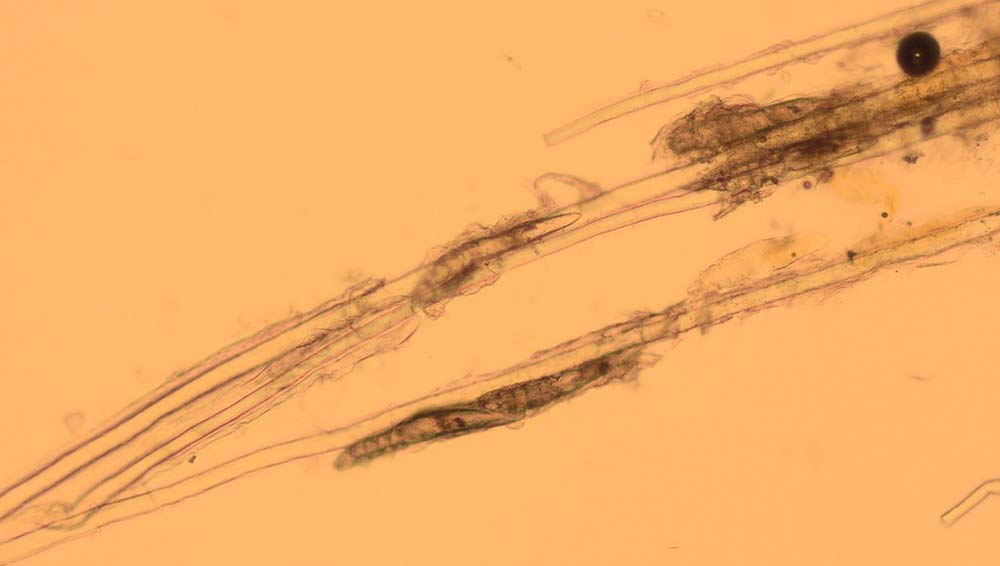
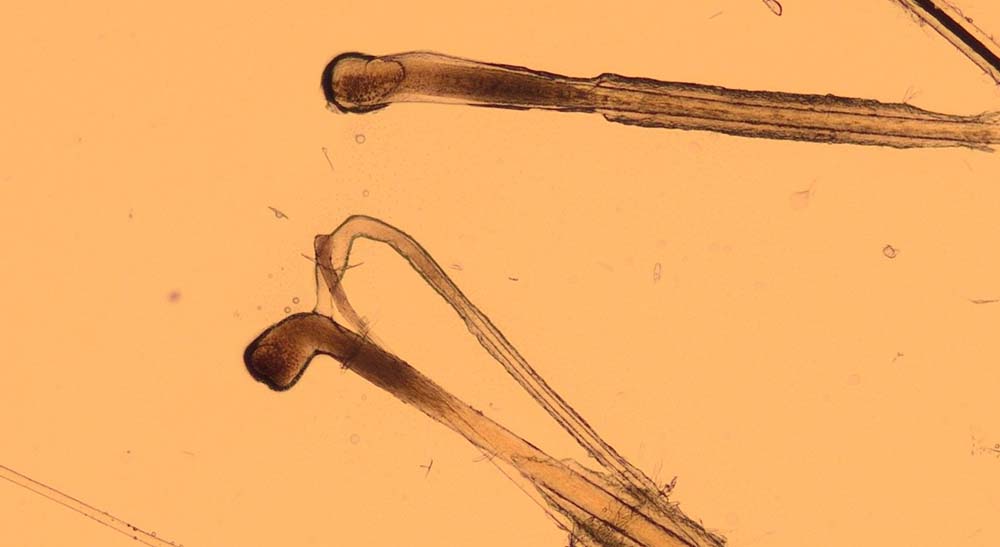
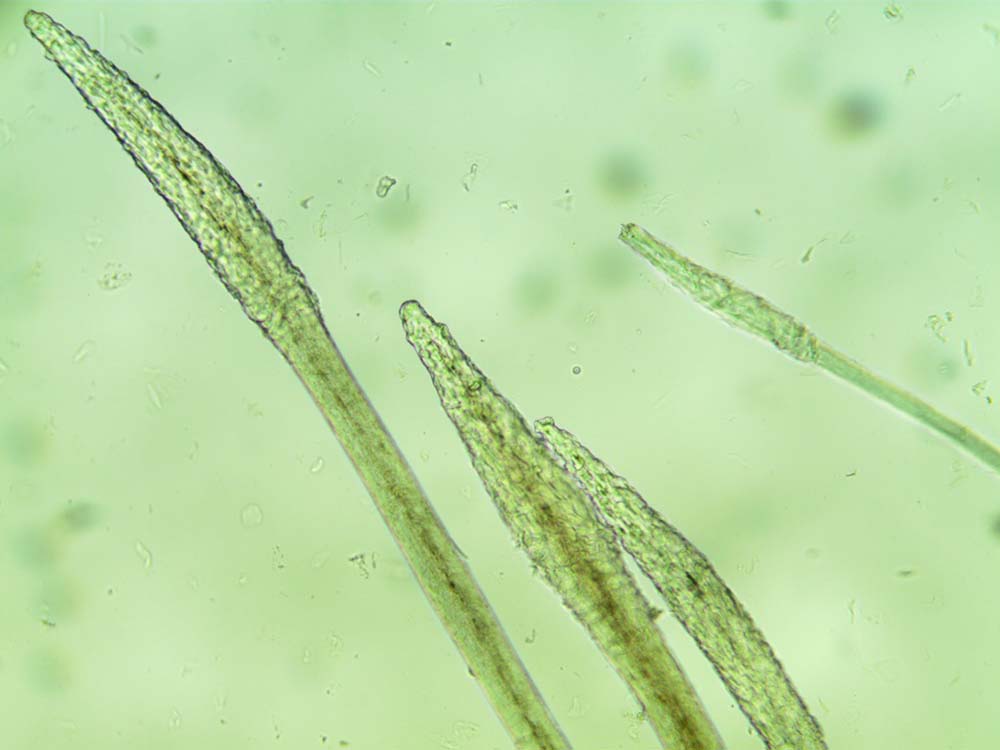
The bulbs of the hair shafts are inspected to determine the stages of hair growth (Figures 7 and 8), which can be informative in alopecic conditions. The tips of the hair can also be examined to look for evidence of traumatic fracture associated with licking/chewing/biting. As a result, hair plucks may be indicated in patients presenting with pruritus, alopecia, follicular casting (scaling on the hairs) and papules/nodules.
Small groups of hairs are plucked from the skin with fingers or forceps. The hairs are placed into a few drops of paraffin oil on a microscope slide, and a coverslip is applied. It can be helpful to try to grasp the hairs as near to the skin as possible to avoid traumatic fracture.
The area under the coverslip is scanned with a 4× objective lens. Areas of interest can be examined with a 10× objective. A higher-power lens is usually only needed to see the hyphae and arthroconidia of a dermatophyte infection.
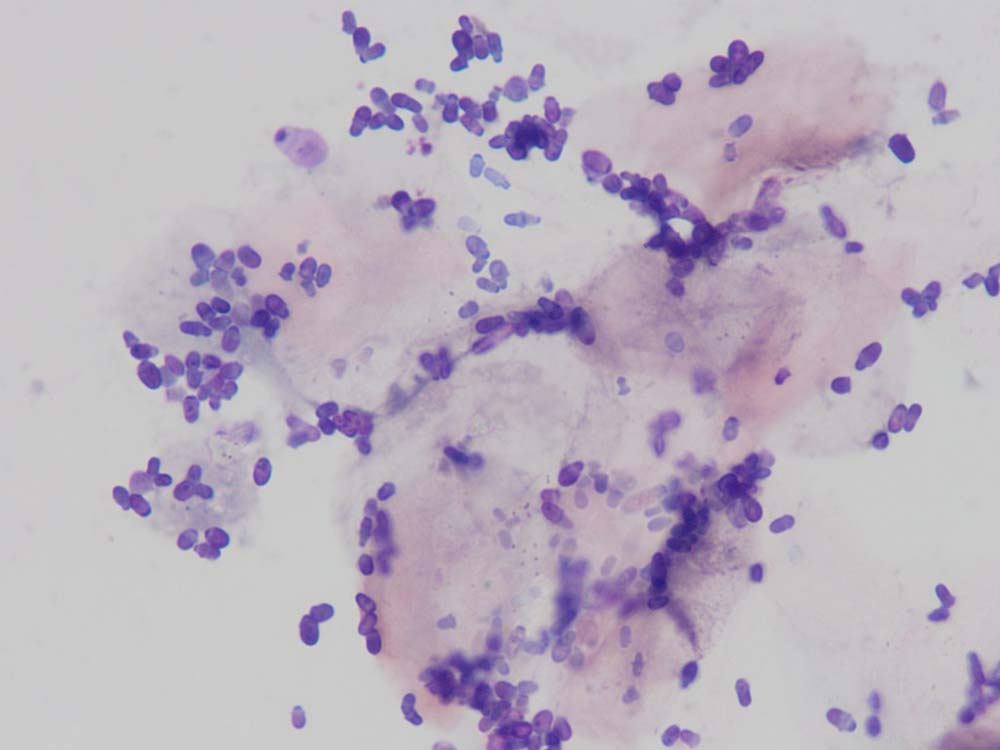
Tape impressions are a very effective way of diagnosing microbial overgrowth and superficial infections caused by bacteria and yeast (Figures 9 and 10). They can also be used to collect material from the skin surface to look for superficial parasites such as fleas, lice, Cheyletiella species, Neotrombicula autumnalis and some forms of Demodex species. They are indicated in dogs and cats presenting with erythema, scaling and crusting.
A short (roughly 5cm) length of sticky tape is placed on to the skin lesion several times. The author uses Sellotape Super Clear, but others are appropriate, too. If sampling for surface infections and inflammation, the tape is stained with a routine in-house Romanowsky-type stain.
The tape is only placed in pots two and three of these kits (about six dips in each pot), as the tape turns cloudy if placed in pot one. The tape is then rinsed with water and placed sticky side down on a microscope slide.
If looking for parasites, no staining is required, and the tape is immediately placed sticky side down on a microscope slide.
With a stained tape impression, a low-power 4× objective lens is used initially to find an area to focus on. Then, a drop of immersion oil is placed directly on to the tape without a coverslip, and an oil objective lens (50× or 100×, usually with a black line on it to indicate an oil lens) is used to examine the area.
With an unstained tape impression, a low-power 4× objective lens is used to scan over the sample; a 10× objective lens is used to focus on an area of interest.
Microscopic examination of the cerumen within the ear canal is used to look for evidence of Otodectes cynotis and, occasionally, Demodex species mites.
It is indicated in dogs and cats – especially young – with excessive cerumen and signs of otitis.
A cotton-tipped swab is introduced into the ear to collect a sample of cerumen. The swab is then rolled on to a microscope slide to transfer the material to the slide.
A curette can also be used to collect cerumen and seems to have a higher diagnostic sensitivity for finding Otodectes cynotis (Combarros et al, 2019). A few drops of paraffin oil are added and a coverslip is applied.
The area under the coverslip is scanned with a low-power 4× objective lens. A 10× objective is used to focus on an area of interest.
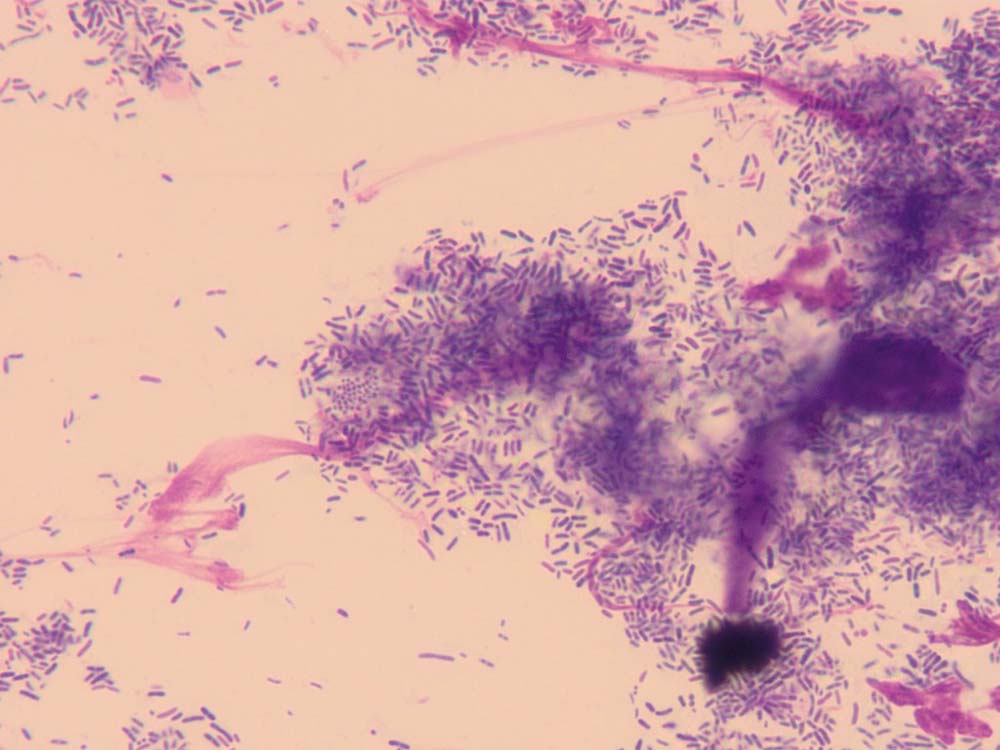
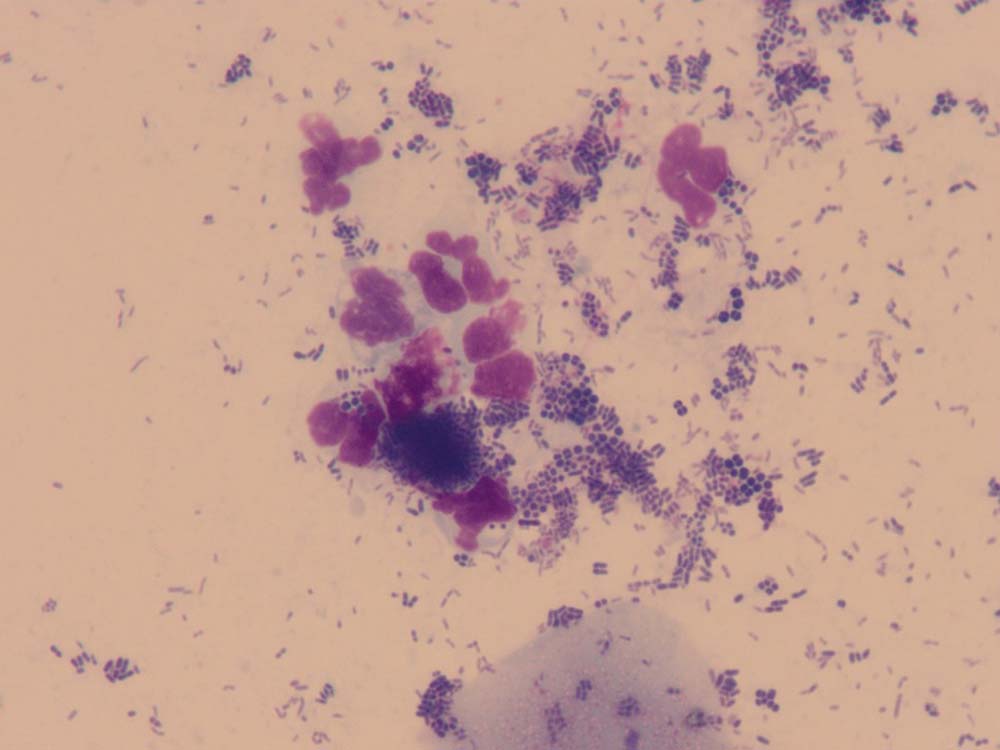
Cytology of otic discharge/cerumen is usually performed to look for evidence of microbial infections and inflammation (Figures 11 and 12). It is an essential test to diagnose ear infections and judge the response to treatment.
A cotton-tipped swab is introduced into the ear canal to collect discharge/cerumen. This is then rolled on to a microscope slide and allowed to air dry; some clinicians prefer to heat fix these samples, but the author does not routinely do this. The slide is then stained in all three pots of the in-house staining kit (about six dips in each pot) and then rinsed gently with water.
A low power 4× objective lens is used initially to find an area to focus on. A drop of immersion oil is then placed directly on to the microscope slide and an oil immersion objective lens (black line) is used to examine the area.
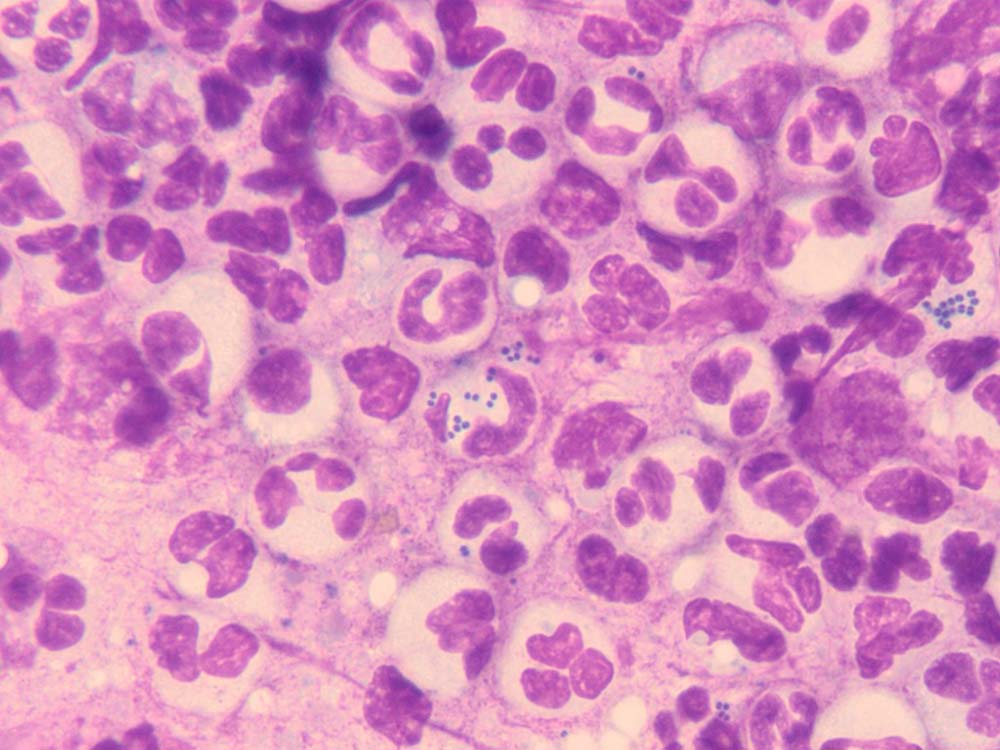
To look for bacteria and inflammatory cells (Figures 13 and 14).
A sterile needle is used to open the top of these fluid-filled lesions. The liquid contents can then be transferred to a cotton-tipped swab, which is then rolled on to a microscope slide, or a microscope slide can be placed on to the lesion to perform an impression smear. The slide is air dried and then stained in all three pots of the in-house staining kit.
Analysed in the same way as a swab for ear smear cytology.
To look for microbial overgrowth, superficial infections and inflammation.
Tape impressions are less effective on moist lesions and a direct impression smear is often more appropriate. A microscope slide is placed directly on to the lesion and then allowed to air dry. The slide is stained in all three pots of the in-house staining kit and then rinsed gently with water.
Analysed in the same way as a swab for ear smear cytology.
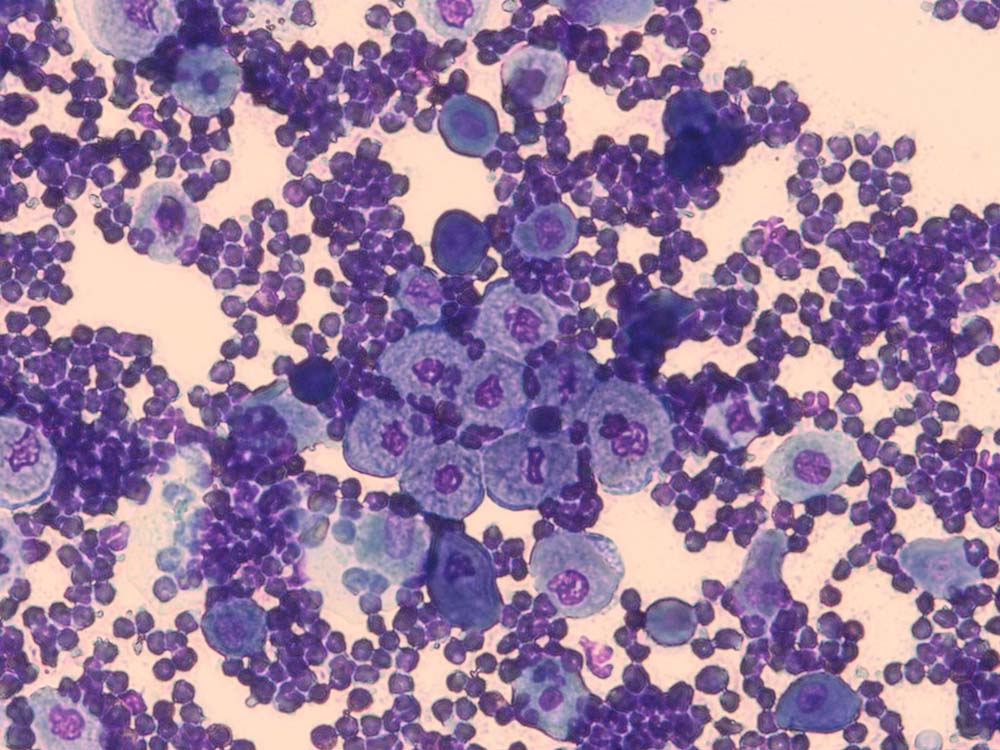
To look for inflammatory cells, infectious organisms and neoplastic cells.
Needle aspiration is best for these lesions. A 21G to 23G needle is inserted into the lesion multiple times to collect material into the lumen.
An air-filled syringe (2mL or 5mL) is then attached to the needle and the contents ejected on to a microscope slide.
If this technique fails to harvest an adequate sample, a syringe can be attached to the needle while within the lesion to provide negative pressure.
A smear of the collected material is made gently between two microscope slides and the sample is allowed to air dry.
It can be stained in all three pots of the in-house staining kits, although if it is going to be submitted to a pathologist, it is advisable to leave the slide unstained.
As cytological interpretation of neoplastic lesions is a specialised area, the samples are usually sent to a pathologist.
If samples are analysed in-house, then the process is the same as for ear smear cytology.
Sampling of the skin is hugely important in the effective management of dermatological disease.
Most of the time, samples can be taken quickly and without the need for sedation or anaesthesia; this is greatly facilitated by having enthusiastic support staff to help.
With a bit of practice, most samples can be taken and analysed with confidence in-house.