Register

Login

Vet Times logo
+
  • View all news
  • Vets news
  • Vet Nursing news
  • Business news
  • + More
    • Videos
    • Podcasts
  • View all clinical
  • Small animal
  • Livestock
  • Equine
  • Exotics
  • All Jobs
  • Your ideal job
  • Post a job
  • Career Advice
  • Students
About
Contact Us
For Advertisers
NewsClinicalJobs
Vet Times logo

Vets

All Vets newsSmall animalLivestockEquineExoticWork and well-beingOpinion

Vet Nursing

All Vet Nursing newsSmall animalLivestockEquineExoticWork and well-beingOpinion

Business

All Business newsHuman resourcesBig 6SustainabilityFinanceDigitalPractice profilesPractice developments

+ More

VideosPodcastsDigital Edition

The latest veterinary news, delivered straight to your inbox.

Choose which topics you want to hear about and how often.

Vet Times logo 2

About

The team

Advertise with us

Recruitment

Contact us

Vet Times logo 2

Vets

All Vets news

Small animal

Livestock

Equine

Exotic

Work and well-being

Opinion

Vet Nursing

All Vet Nursing news

Small animal

Livestock

Equine

Exotic

Work and well-being

Opinion

Business

All Business news

Human resources

Big 6

Sustainability

Finance

Digital

Practice profiles

Practice developments

Clinical

All Clinical content

Small animal

Livestock

Equine

Exotics

Jobs

All Jobs content

All Jobs

Your ideal job

Post a job

Career Advice

Students

More

All More content

Videos

Podcasts

Digital Edition


Terms and conditions

Complaints policy

Cookie policy

Privacy policy

fb-iconinsta-iconlinkedin-icontwitter-iconyoutube-icon

© Veterinary Business Development Ltd 2025

IPSO_regulated

13 May 2019

Getting the most from companion animal eye examinations

Josie Parker describes her approach to ocular cases, including how to examine for manifestations of systemic disease.

author_img

Josie Parker

Job Title


Getting the most from companion animal eye examinations

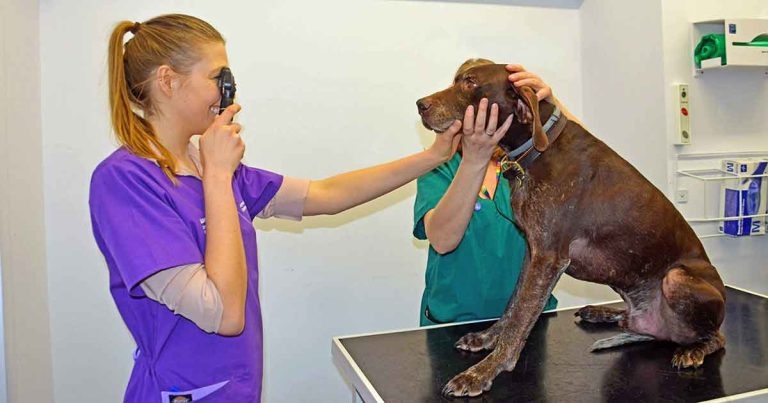
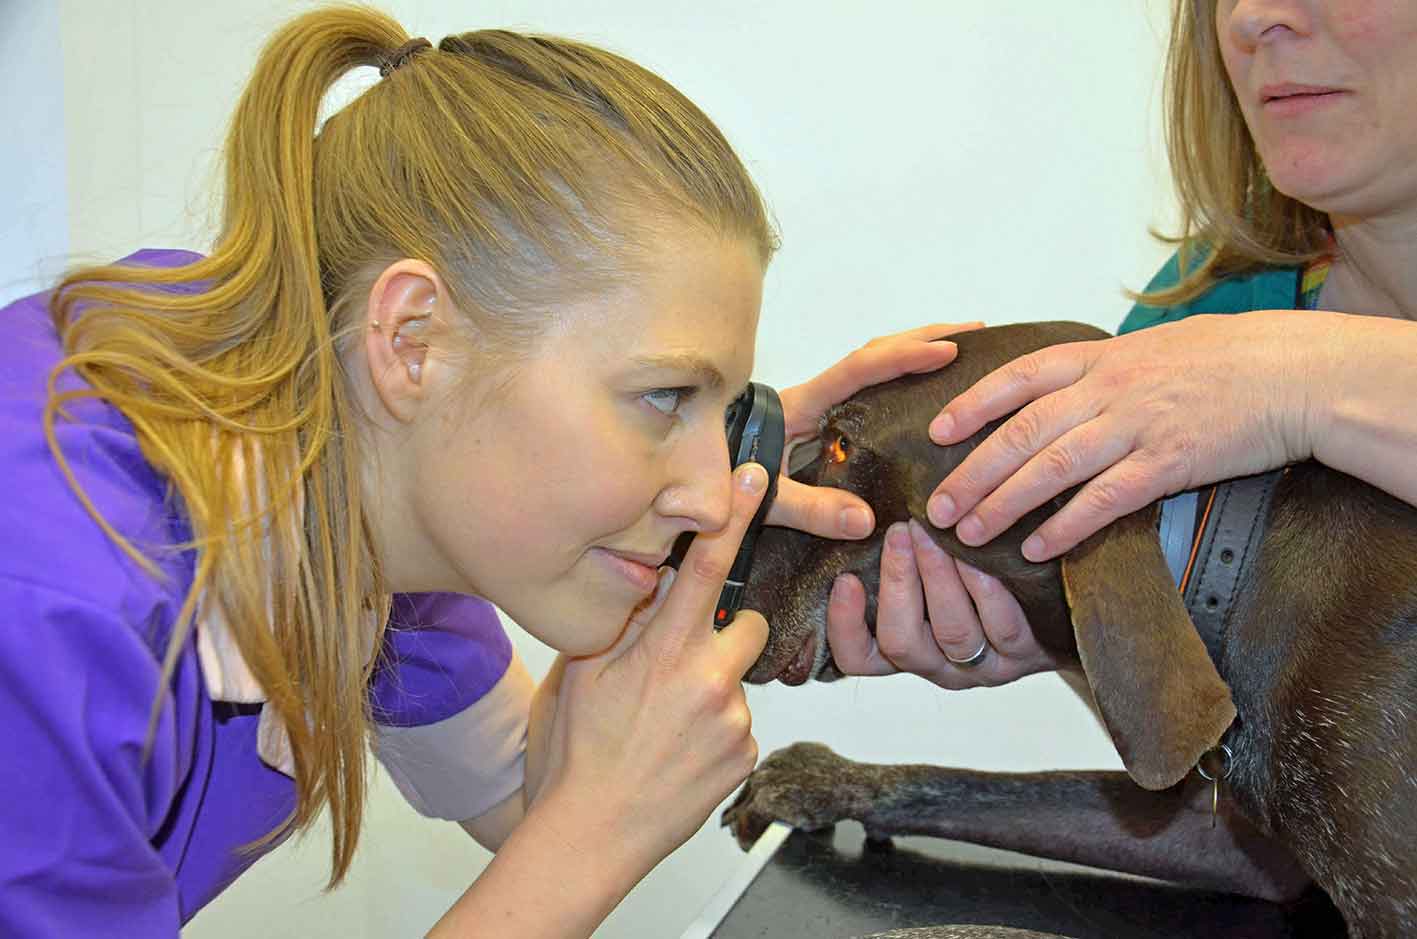
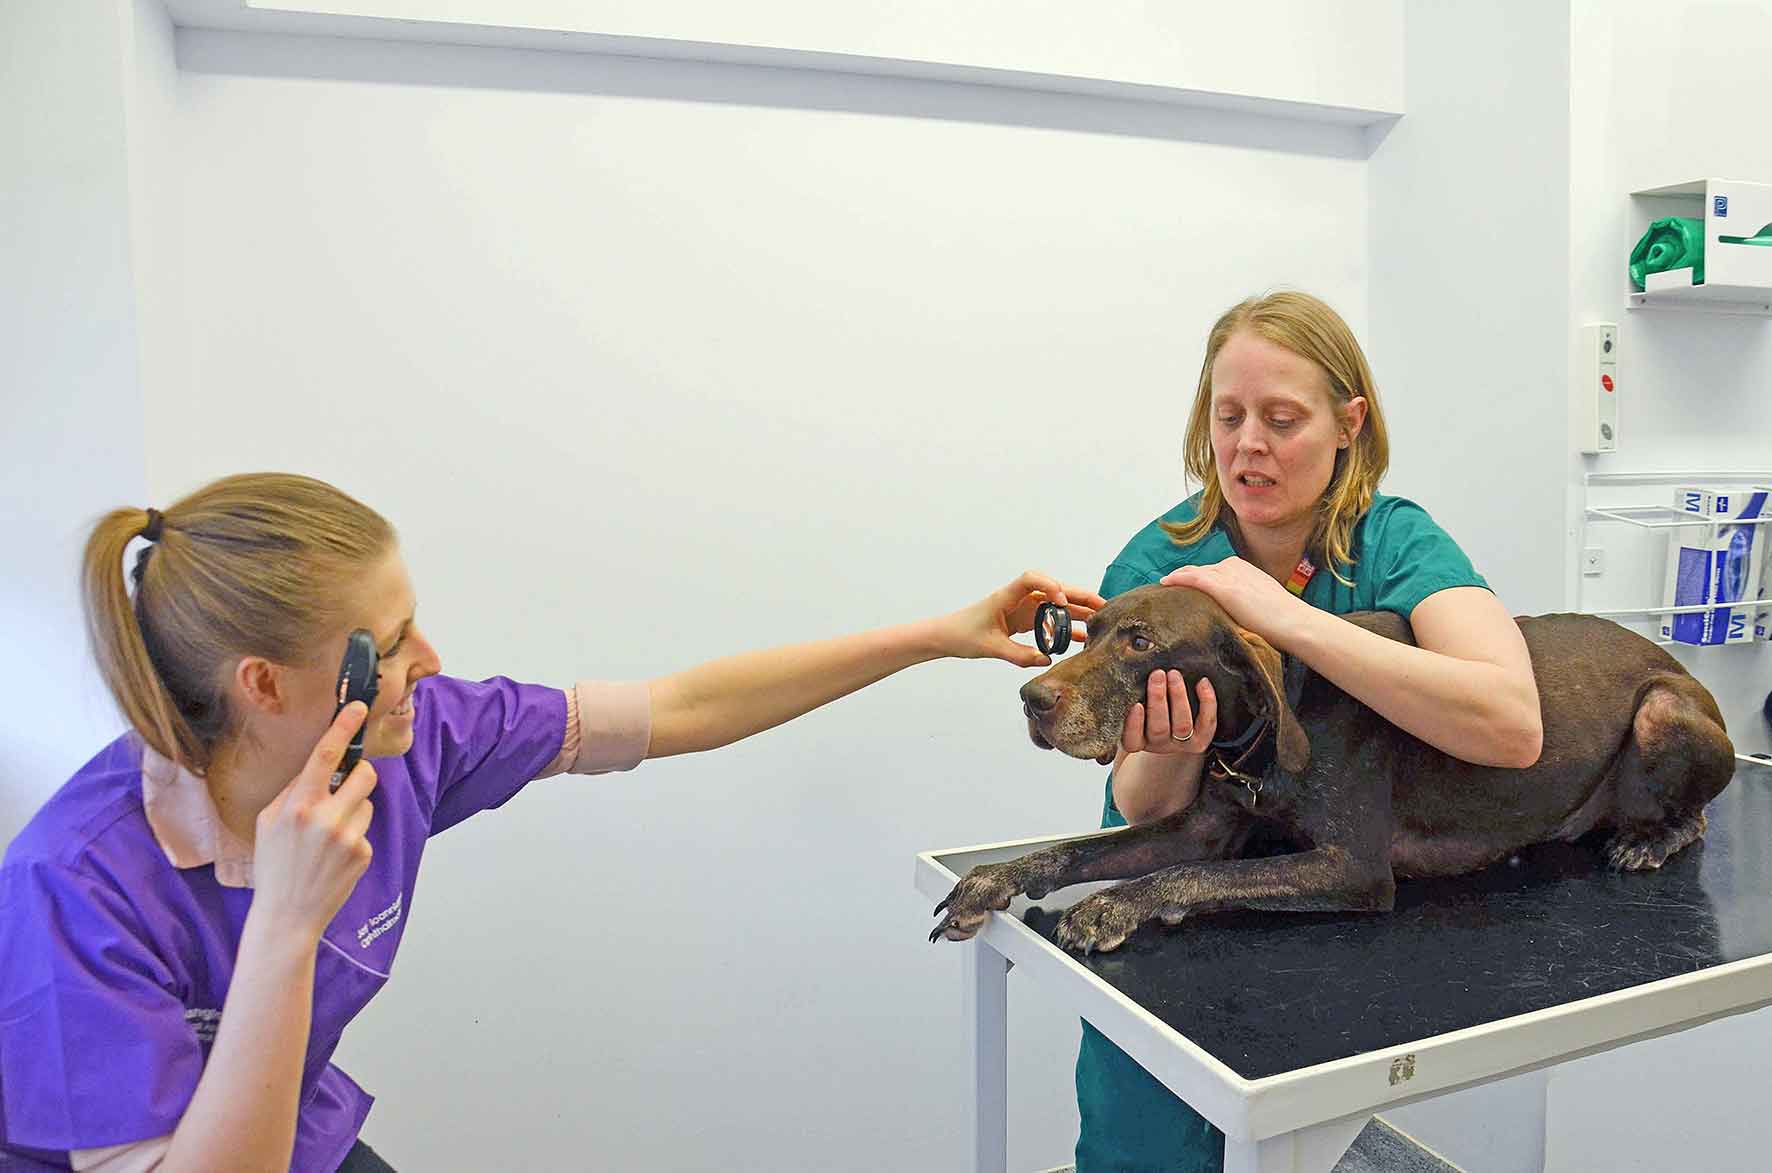
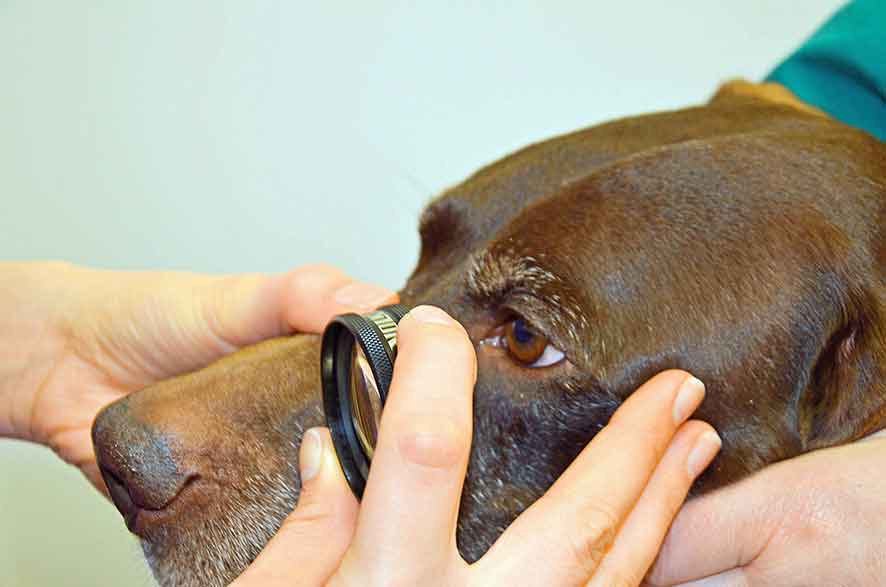
Figure 1. Distant direct ophthalmoscopy. Note the person restraining the patient is positioning the head to look at the examiner by supporting underneath the chin.

Eye cases can pose a difficult clinical conundrum in first opinion practice.

They are often made even more tricky due to limited equipment and inadequate lighting conditions. Battling with the settings on a dusty ophthalmoscope with a dying battery to look at a patient attempting to burrow face first into the chest of a worried owner in a brightly lit consult room springs to mind.

Figure 2. An examination under normal light conditions.

Here are a few simple things that can make your examination more fruitful:

  • A dark room. Switch off the lights and close the blinds. This will reduce glare to allow a clearer view of the ocular surface and dilate the pupils to give you a bigger window to look through when examining the fundus.
  • Adequate restraint. Keep the patient’s head steady and in a position where you can access the eye to enable a more in-depth examination. Proper restraint of the patient by the owner or a nurse, with local anaesthetic applied to an uncomfortable eye, will help you enormously.
  • Charged-up equipment. A bright light source – even if you are managing with a pen torch or otoscope – will make all the difference to your examination.
  • Clean equipment. Cleaning away years of dust and fingerprints will drastically improve your view. Inexpensive lens cleaning wipes or sprays are safe to use on the viewing aperture of your ophthalmoscope and indirect lens (also an otoscope, lab microscope and even smartphone camera lens) and can be bought inexpensively.
Figure 3. Distant direct ophthalmoscopy reveals an anisocoria (pupil asymmetry) and a dyscoria (abnormal pupil shape) in the left eye, and an opacity in the visual axis in the right eye.

The equipment you will need to perform a basic work-up is as follows:

  • A focal light source. An ophthalmoscope will give you the added bonus of magnification and the ability to change the brightness, but a transilluminator, pen torch or even otoscope are sufficient enough to illuminate the eye.
  • An indirect lens. Indirect ophthalmoscopy is a difficult skill to master, but learning the correct technique and getting plenty of practice will help you to reap the rewards when examining the fundus of the eye. An acrylic condensing lens can be bought for around £40.
  • A Schirmer tear test and fluorescein stain.
  • A camera with flash. A camera with a flash is a very useful tool for scrutinising the initial presentation of a case, monitoring progress and even gaining specialist advice.

Equipment such as tonometry and a slit lamp will allow you to get more from your ocular exam, but they are not always available in first opinion practice.

How to use an ophthalmoscope

Figure 4. Close direct ophthalmoscopy. Note the examiner has placed her index finger on the dial ready to adjust the refractive power of the ophthalmoscope.

The ophthalmoscope is a versatile and essential piece of equipment, but its full potential is rarely used beyond that of an expensive pen torch. Many brands of ophthalmoscope exist, all with their own quirks and differences, but all are variations on a theme. Taking the time to familiarise yourself with the dials and settings will help you significantly when it comes to your exam.

The ophthalmoscope light is a rheostat, like a dimmer switch, which means you can control the brightness. The temptation is often to turn it to the maximum brightness for the whole of the exam, but it can be useful to dim the intensity when performing distant, direct ophthalmoscopy.

A whole array of light beam shapes is available, but the only two you need are the biggest circular beam and, occasionally, the slit beam setting. The colour filters of most use are the white light and the cobalt blue light for assessing fluorescein uptake.

The number indicates the ophthalmoscope’s refractive power setting, in dioptres, and can be altered by turning the dial on the side.

What do the refractive power values mean? Changing the refractive power of the ophthalmoscope changes the focal point:

  • The zero setting means no refractive power.
  • Positive values (black/green). These increase dioptic power to bring the focal point closer to you.
  • Negative values (in red). These diverge the beams of light and push the focal point away from you.
Figure 5. Actual orientation of the fundus.

The best baseline setting on the ophthalmoscope for you is determined by your own eyes. If you do not require glasses, or are wearing contact lenses, this will be zero.

If you wear glasses, remove them and set the number to your prescription. For short-sighted eyes the setting will be in the negative (red) values; for long-sighted eyes it will be in the positive (black or green) values.

Distant direct ophthalmoscopy

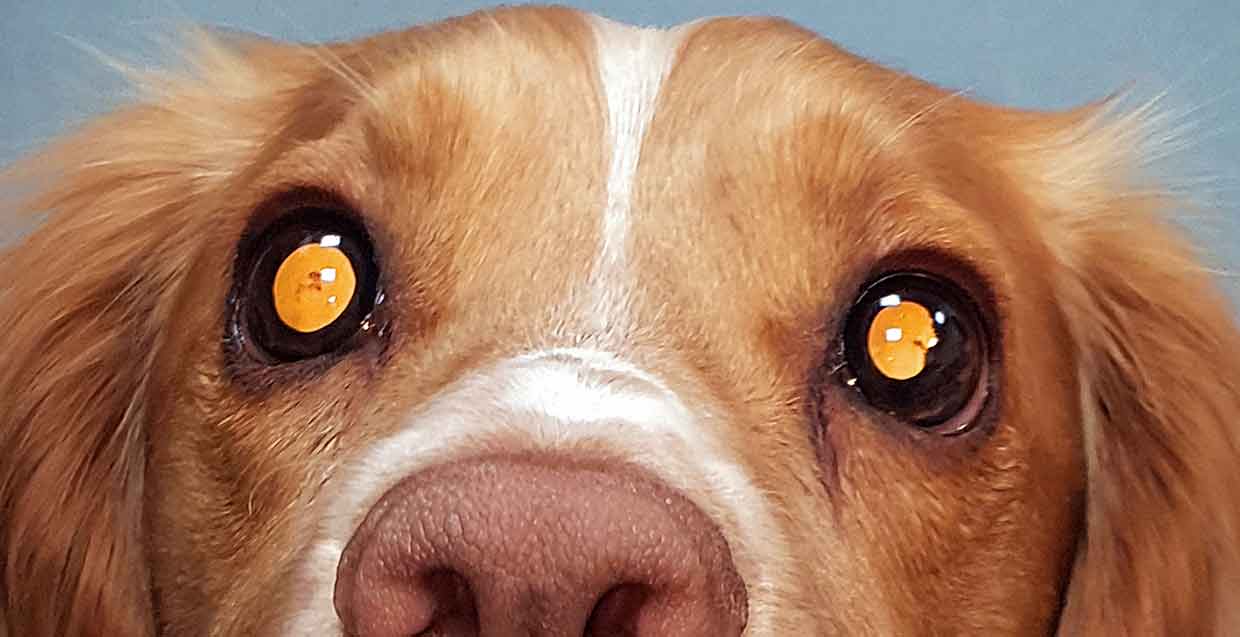
Distant direct ophthalmoscopy assesses the clarity of the visual axis and the symmetry of the pupils (Figure 1).

How do I perform this technique?

To perform distant direct ophthalmoscopy:

  • In the dark.
  • Have the patient at arm’s length.
  • Put a hand on the patient’s chin or nose to help steady its head and keep it looking at you.
  • Stand directly in front of the patient so you can examine both eyes in the same field of view.
  • The brightness setting should be of moderate light intensity.
  • Look through the ophthalmoscope rather than hold it at the side of your head – this aligns the beam of light with your own eye.

What should the number be on my ophthalmoscope?

The number on your ophthalmoscope should be your baseline setting.

What should I be able to see?

You should be able to see the tapetal reflection in both eyes.

Figure 6. A view with indirect ophthalmoscopy. An overview of the fundus.

Tips for finding the reflection:

  • The tapetum is located dorsally. Look from below the patient’s eyeline. Attract the patient’s attention by calling its name or making a squeaking, hissing or whistling noise.
  • Examine the brightness of the reflection and the size of the pupils. Look for the presence of any opacities and the size of the pupil.

What does this help diagnose?

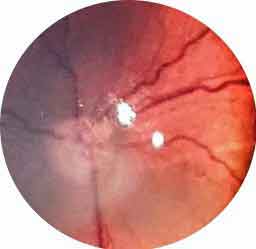
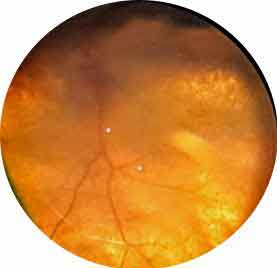
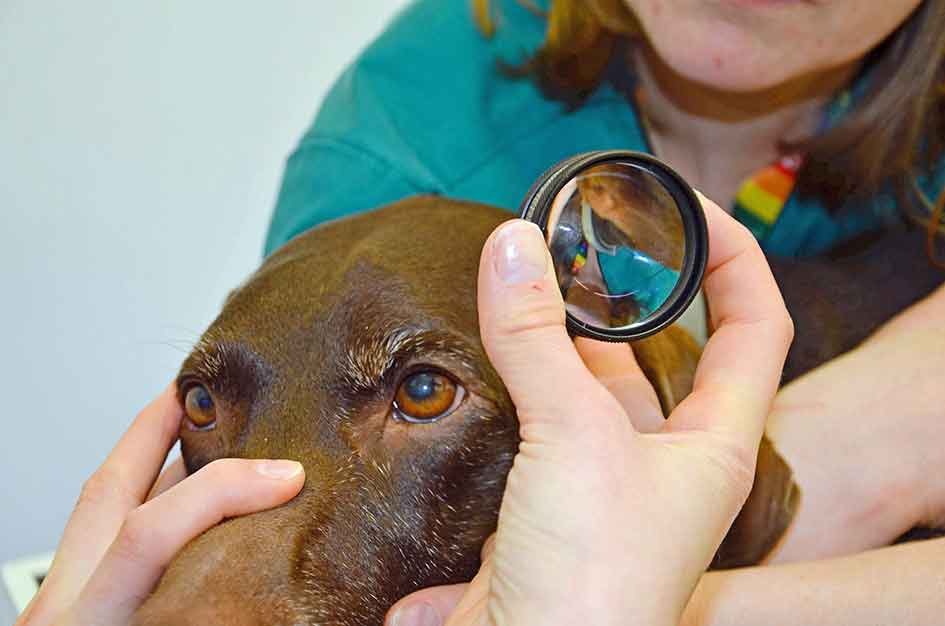
Distant direct ophthalmoscopy helps diagnose opacities in the visual axis, such as cataracts or anisocoria – asymmetrical pupils (Figures 2 and 3).

Close direct ophthalmoscopy

Ophthalmologists tend to use close direct ophthalmoscopy for in-detail examination of the fundus – preferring to use a slit lamp to examine the anterior structures in the eye. However, direct ophthalmoscopy can be used very effectively for the examination of the whole eye.

What should the number be on my ophthalmoscope?

Start with your baseline setting on your ophthalmoscope to examine the fundus.

  • Increasing the positive dioptric power (green or black numbers) brings the focal point of the ophthalmoscope towards you. This makes it possible to view structures inside the eye that are closer to you than the fundus – such as the vitreous, lens, iris or cornea – in magnified detail while allowing you to remain at the same distance from the patient.
  • Before you look through the ophthalmoscope, familiarise yourself with the direction you need to turn the dial on the side to increase the positive refractive power
  • Figure 7. A view with direct ophthalmoscopy. A detailed, magnified view of the fundus.
    Figure 7. A view with direct ophthalmoscopy. A detailed, magnified view of the fundus.

    Be aware the brightness of the light decreases with increasing dioptric power (the same as the change in brightness on a light microscope from ×10 to ×40), so increase the brightness if you are struggling to visualise structures at higher settings.

The settings required for a magnified view of the ocular structures vary according to your own eyes, but as a rule of thumb: fundus 0, lens +10, iris +15, cornea +20, and eyelids +25 to +30.

How do I perform this technique?

To perform close direct ophthalmoscopy:

  • Do so in the dark.
  • Start by performing distant direct ophthalmoscopy as described previously.
  • Maintain your view of the tapetal reflection in one eye as you move in from arm’s length until you are close enough to rest a finger from the hand holding the ophthalmoscope on the patient’s head.
  • Visualise a structure on the fundus, such as a blood vessel or a spot of pigment or the optic nerve head. Once visualised, keep it in view and adjust your distance with small movements towards or away from the patient until it comes into focus. Once in focus, stay at this distance away from the patient and rotate yourself to look around the fundus.
  • If you want to look at something closer to you, such as the iris or cornea, stay at the same distance away from the patient and adjust the dial on the side of the ophthalmoscope to increase the positive dioptres until that structure comes into focus (Figure 4).

When fundus NAD in your notes translates to fundus not actually detected

The fundus is one of the most exquisitely beautiful structures in the body, but such significant variation exists between individuals, breeds and species that it is very difficult to detect abnormalities. The examination techniques require practice and perseverance to gain any useful diagnostic information.

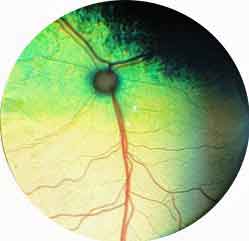
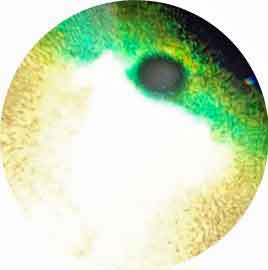
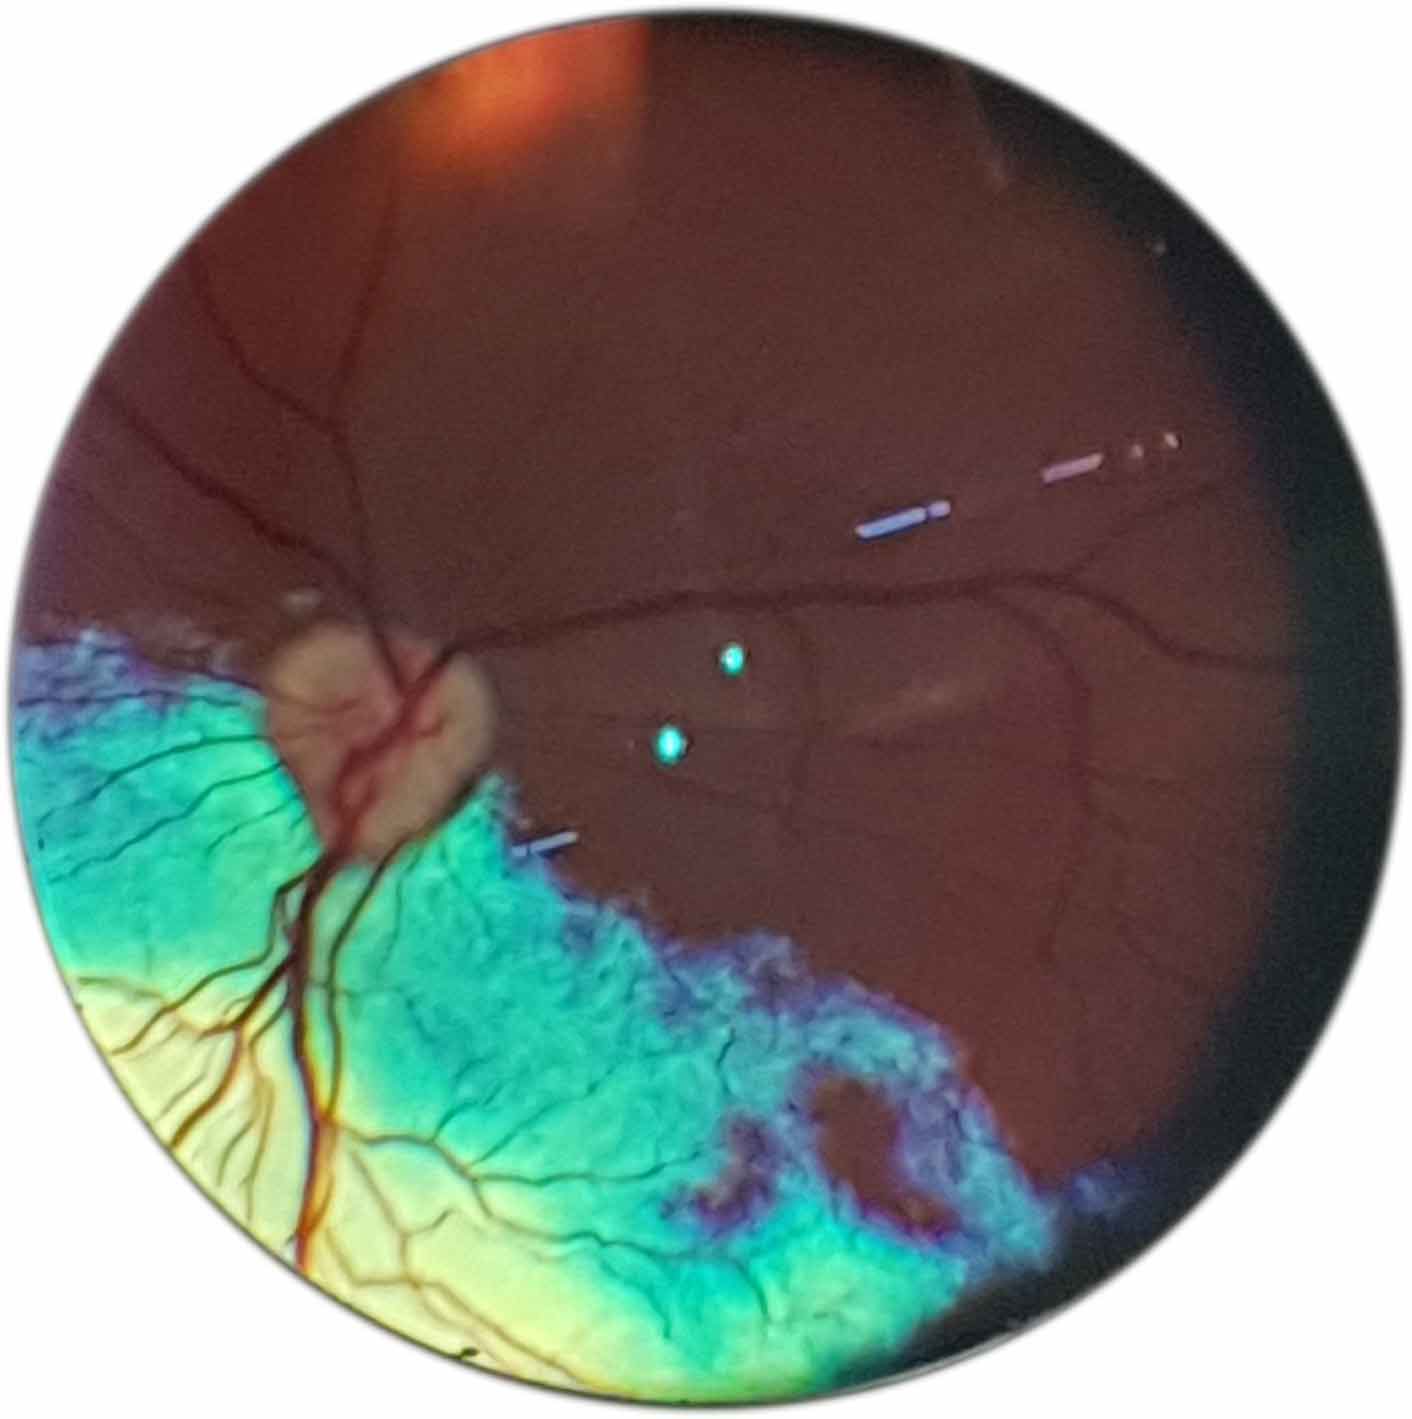
The fundus can be examined using both direct and indirect ophthalmoscopy. Indirect ophthalmoscopy provides an overview of the fundus, but direct ophthalmoscopy enables a more detailed examination of a smaller area. (Figures 5 to 7).

Indirect ophthalmoscopy

Indirect ophthalmoscopy is one of the most difficult techniques to master, but can be endlessly rewarding as it affords an overview of the fundus, which you can then apply direct ophthalmoscopy to examine areas of interest in fine detail.

Equipment

1. Condensing lens

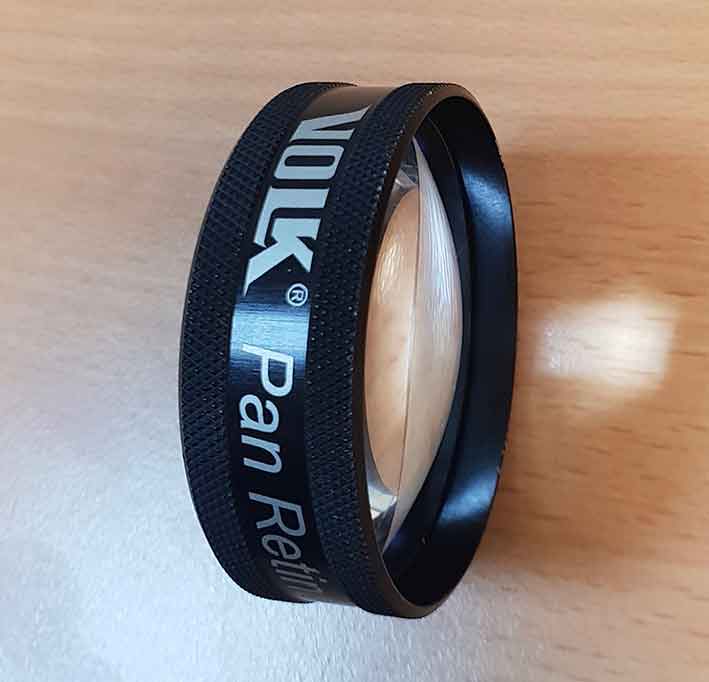
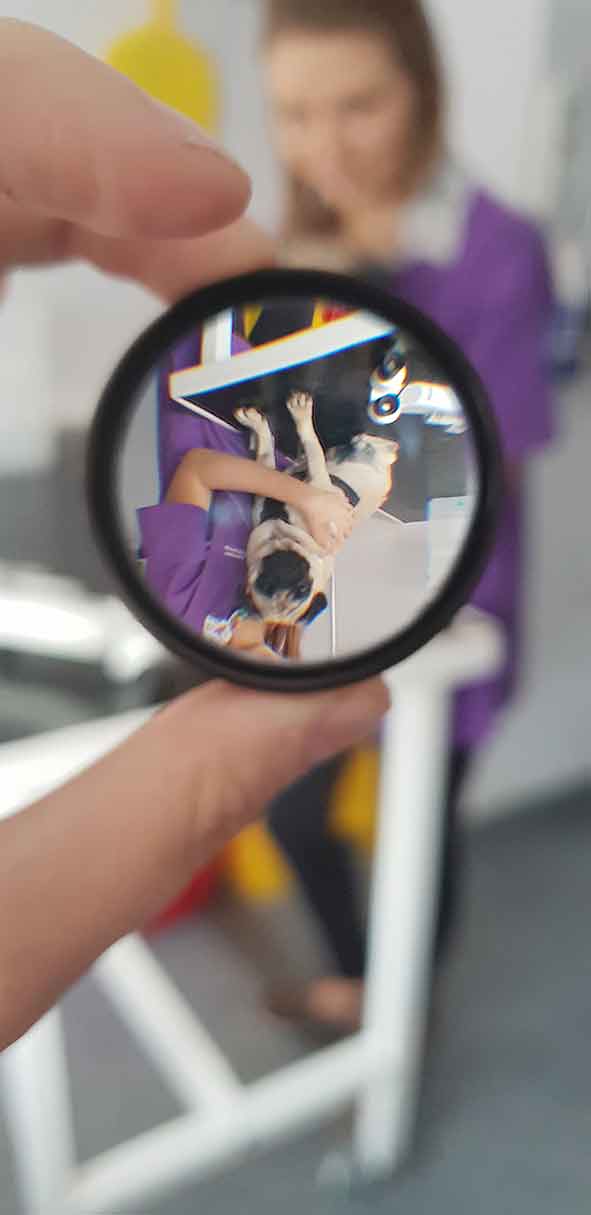
The lens creates an upside down, back to front virtual image of the fundus. The standard condensing lens is a 20D lens, although some prefer the 2.2 (22D) pan retinal lens, while others favour 28D or 30D lenses for small animal patients.

Glass lenses produce a sharp image of extremely high quality. They are more expensive – costing around £300 – heavy and easily chipped, and must be handled with a lot of care.

Acrylic lenses are the cheap and cheerful option, costing approximately £40. They are lightweight and resilient enough to withstand being dropped on the floor. They are a great starter lens, as they are versatile and can produce an image of diagnostic quality.

The technique is just as tricky with either glass or acrylic lens – requiring the same amount of practice and perseverance.

Which way round should the lens be?

These pictures demonstrate differences in the curvature of each side of the lens. Figure 8. This surface is convex and curves outwards. This is the “belly” side of the lens and should face the examiner.

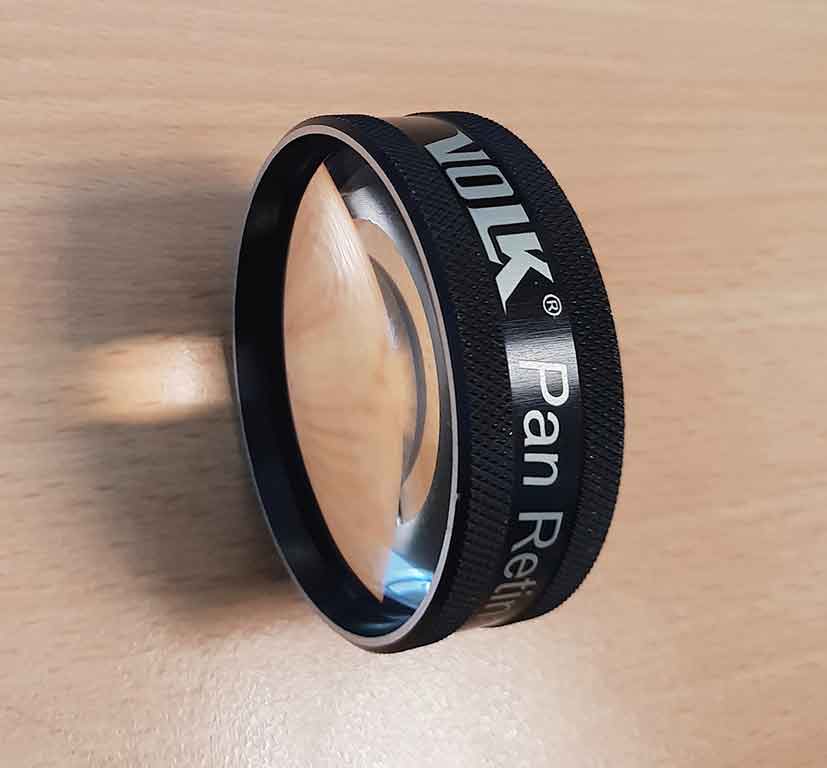
If you look at the lens from above, one side is flat and the other is more curved – that is, it has a “belly”. The flatter side should be positioned facing the patient and the belly of the lens towards the examiner – that is belly to belly (Figure 8). Some lenses have a metallic rim to indicate the side that should face the patient (Figure 9), but others are less helpful, and it can be useful to put a dot of paint to quickly identify this side.

2. The light source

A focal light source at moderate to low light intensity such as a transilluminator, pen torch, direct ophthalmoscope or otoscope. The condensing lens does what it says on the tin – it condenses the beam of light as it passes through. The beam emitted from your light source will be intensified, so it is important to use the lowest possible brightness to make it tolerable for your patient.

How do I perform this technique?

To perform indirect ophthalmoscopy:

  • Ask the person restraining the patient to raise the head slightly by supporting the chin (Figure 10).
  • Hold your light source close to your eye. The beam of light needs to be in the same plane as your visual axis as if the light was emitted from your own eye.
  • Find the tapetal reflection in one eye. You will not be able to see an image with your lens without the tapetal reflection (Figure 11).
  • Hold your condensing lens between your thumb and index finger, and rest your middle and ring fingers on the patient’s temple (Figure 12).
  • While maintaining your view of the tapetal reflection, rotate your hand holding the condensing lens to place the lens in front of the eye. Imagine slotting the lens perpendicular to the beam of light passing from your eye to the patient’s fundus (and therefore parallel to the eye).

Upside down and inside out

Figure 9. This surface is much flatter and is, therefore, the side that faces the patient. Note the metallic rim.

When you move the lens to look around the periphery of the fundus, remember the image is inverted, so when you move the lens medially, the image will move laterally and when you move dorsally, the image will move ventrally and vice versa (Figure 13). This can be very confusing to begin with, but with enough practice, will become second nature.

Tips for success

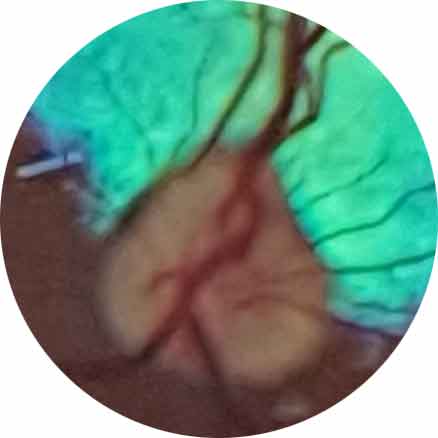
Within the fundus the tapetum sits dorsally and the optic nerve head sits slightly ventrally. Place the patient on a table and crouch down so you are looking up towards its eye. This positioning will help to initially identify the tapetal reflection, and when you place the lens in front of the eye and stand up slightly, it will aid your view of the ventral fundus and the optic nerve head.

Dilate the pupil with a drop of 1% tropicamide. This will give you a wider aperture to look through and minimise the need to move the lens to look around the periphery of the fundus.

Binocular head sets are often used by ophthalmologists instead of monocular light sources, such as a pen torch. This has the advantage of allowing placement of both hands on the patient to help with positioning of the head.

The light source is positioned between the examiner’s eyes. The head set has a series of mirrors to provide a coaxial light beam in line with each eye, which improves depth perception and can aid the diagnosis of papilloedema, retinal detachment, tumours or other mass lesions, and cupping.

So much variation exists in the normal fundus, can anything help me work out what is actually abnormal?

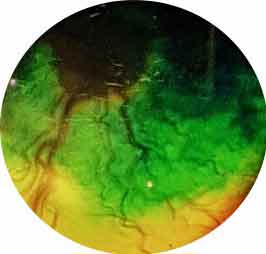
Variations in fundus colour and pigmentation are usually the least clinically significant, but the most distracting findings as they draw the attention of the examiner away from the areas that can actually lead you to a diagnosis (Figure 14).

Figure 10. Monocular indirect ophthalmoscopy. Note the examiner is crouching down slightly and the patient’s head is positioned to look at the examiner.

Generally, the most clinically significant areas are:

  • Diameter and pattern of the blood vessels. Why?
    • Thin, attenuated – chronic retinal degeneration, for example, progressive retinal atrophy (PRA).
    • Blurry, red – retinal haemorrhage; white – perivascular cuffing, hyperlipidaemia.
    • Tortuous, wiggly – vascular disease, for example, hypertension.
  • Colour and size of the optic nerve head. Why?
    • Large and puffy – papilloedema; if blind – optic neuritis.
    • Small and pale – chronic retinal disease, for example, PRA or glaucoma.
  • Consistency and brightness of the tapetal and non-tapetal fundus. Why?
    • Tapetal hyperreflectivity is a sign of retinal thinning or absence – for example, retinal degeneration.
    • Tapetal hyporeflectivity is a sign of cells, fluid, pigment or retinal folds obscuring the tapetum – for example, retinal oedema or infiltrates, retinal detachment, retinal dysplasia, retinal pigment epithelial dystrophy.
  • Tips for success

Always examine both eyes – most normal variations in fundus appearance are roughly symmetrical.

Remember, if you identify an abnormality on indirect ophthalmoscopy, use direct ophthalmoscopy to examine this area in magnified detail.

Figure 11. Positioning of the hand holding the lens while the examiner finds the tapetal reflection prior to placing the lens in front of the eye.
Figure 12. Positioning of the hand holding the lens during indirect ophthalmoscopy.
Figure 13. A demonstration of how the image is altered by the lens; the pug and vet appear both upside down and back to front.

Taking ocular images with a smartphone

Photographing the eye is an excellent way to document the initial presentation and progression of a case, but they can also be sent to ophthalmologists for a specialist opinion. For example, Langford Vets runs a free email advice service ([email protected]) and can provide more detailed information for cases with a good quality photograph attached.

  • Tips for success

1. Clean away significant ocular discharge and fluorescein stain using saline flush.

2. Turn your flash on.

3. Make sure the camera is focused on the area of interest.

4. Take the picture in a dark room.

5. Attract the patient’s attention, so it is looking directly at you.

Acknowledgement

This article was reviewed by Claudia Hartley BVSc, CertVOphthal, DipECVO, FRCVS and RCVS specialist in ophthalmology.

Figure 14a. Fundus pictures taken on a smartphone using a 22D pan retinal Volk lens (Figures 14a-i). This is the normal canine fundus.
Figure 14b. Canine albinotic fundus.
Figure 14c. Fundus in a cat.
Figure 14d. Tortuous retinal vessels in a dog with hypertensive retinopathy.
Figure 14e. Thin attenuated vessels with a pale optic nerve head in a dog with early progressive retinal atrophy.
Figure 14f. Absent retinal vessels in a cat with taurine deficiency.
Figure 14g. Diffuse tapetal hyporeflectivity in a dog with retinal oedema and panuveitis.
Figure 14h. Diffuse tapetal hyperreflectivity in a cat with taurine deficiency.
Figure 14i. Multifocal retinal dysplasia in a cat
Figure 14i. Multifocal retinal dysplasia in a cat.